Creating Project, Installing mxcad, Writing Basic Code
Create a test project folder named
demoin a suitable location and open acommand line toolin thedemofolder. Then, enter the following commands to initialize the project and import themxcadpackageshnpm init -y npm install vite -D npm install mxcad@latest
Open the test project folder using
VS Code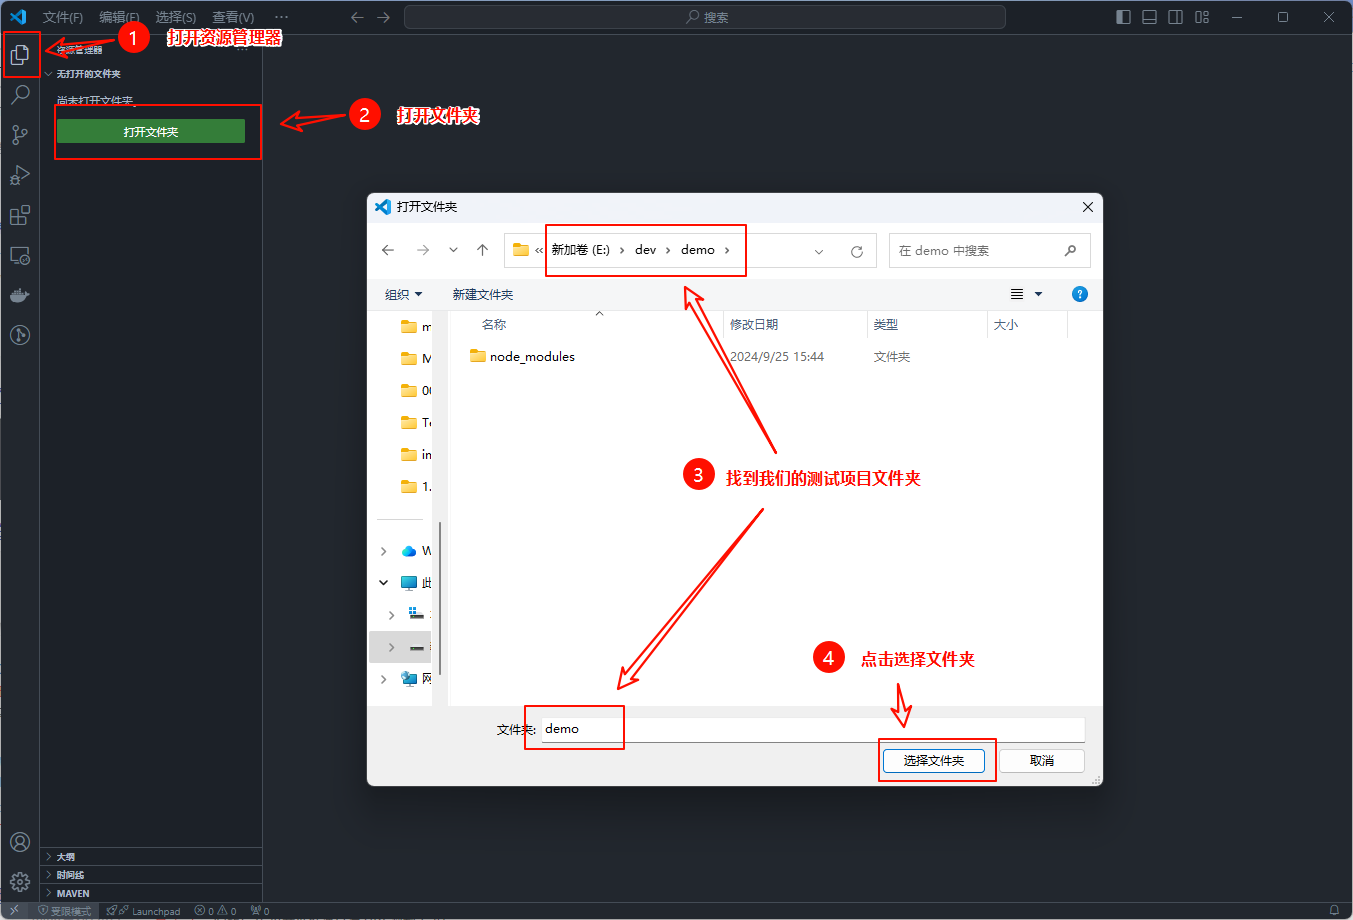 The project folder will open up as shown in the following image
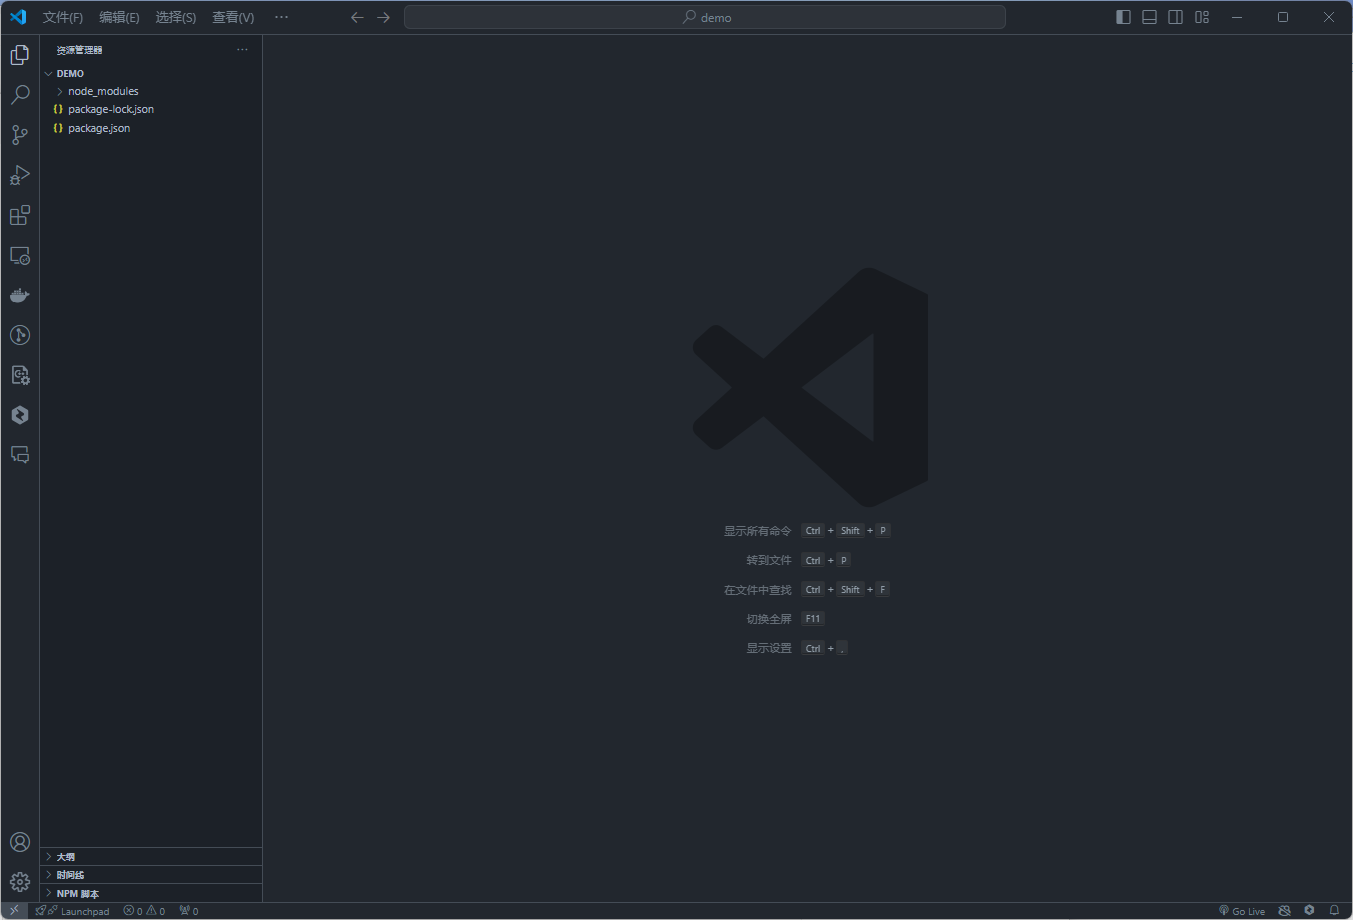
After opening the project, create an
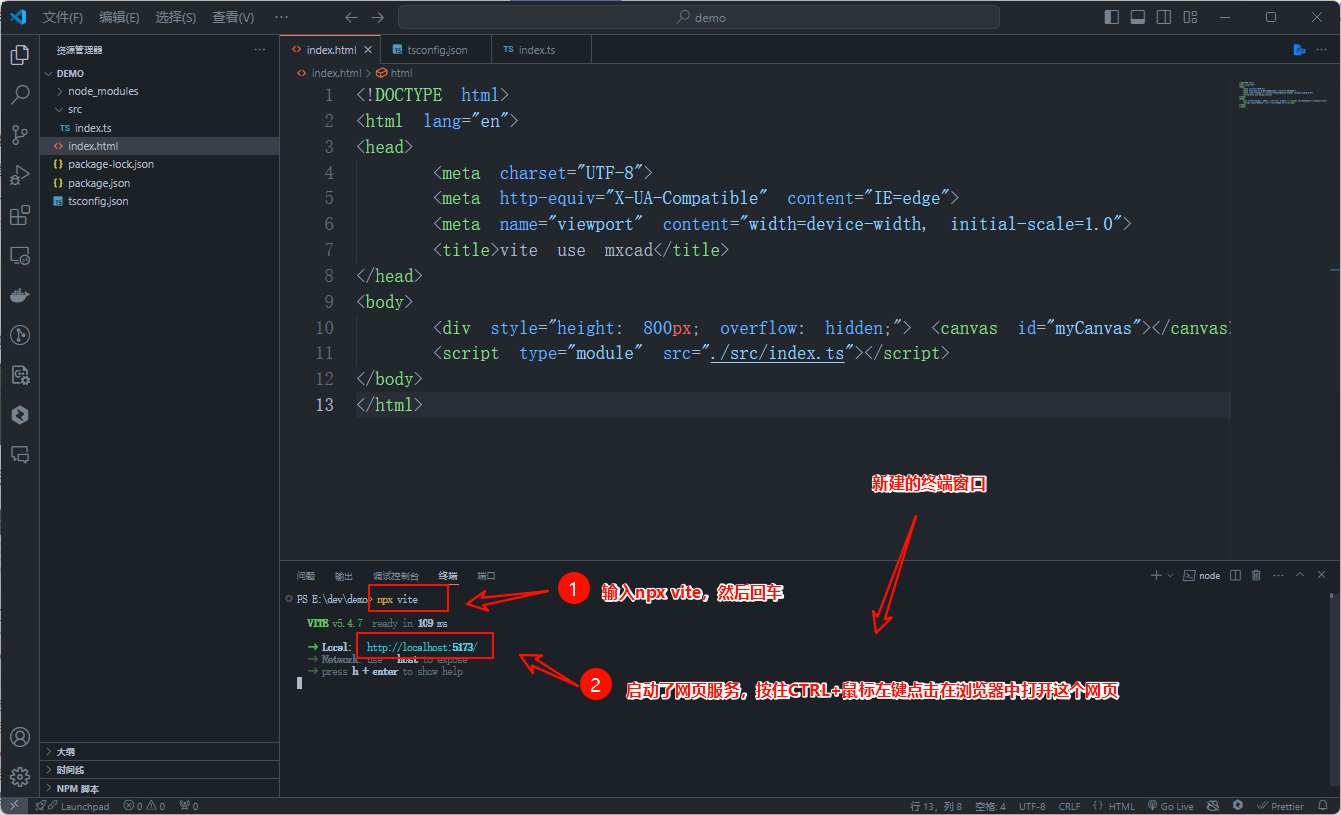
index.html file, atsconfig.json file, and ansrc directoryin the project directory. Then, create anindex.ts filewithin thesrc directoryand write the most basic codeindex.html
html<!DOCTYPE html> <html lang="en"> <head> <meta charset="UTF-8"> <meta http-equiv="X-UA-Compatible" content="IE=edge"> <meta name="viewport" content="width=device-width, initial-scale=1.0"> <title>vite use mxcad</title> </head> <body> <div style="height: 800px; overflow: hidden;"> <canvas id="myCanvas"></canvas></div> <script type="module" src="./src/index.ts"></script> </body> </html>tsconfig.json
json{ "compilerOptions": { "module": "esnext", "moduleResolution": "node", "typeRoots": ["./node_modules/@types", "./typings"] } }src/index.ts
typescriptimport { MxCAD3DObject } from "mxcad" // Create MxCAD3D object const mxcad3d = new MxCAD3DObject() // Initialize MxCAD3D object mxcad3d.create({ // CSS selector string of the canvas element (id selector in the example), or the canvas element object canvas: "#myCanvas", // Get the path location of the wasm-related files (wasm/js/worker.js) locateFile: (fileName)=> new URL(`/node_modules/mxcad/dist/wasm/3d/${fileName}`, import.meta.url).href, }) // Initialization completed mxcad3d.on("init", ()=>{ console.log("Initialization completed"); });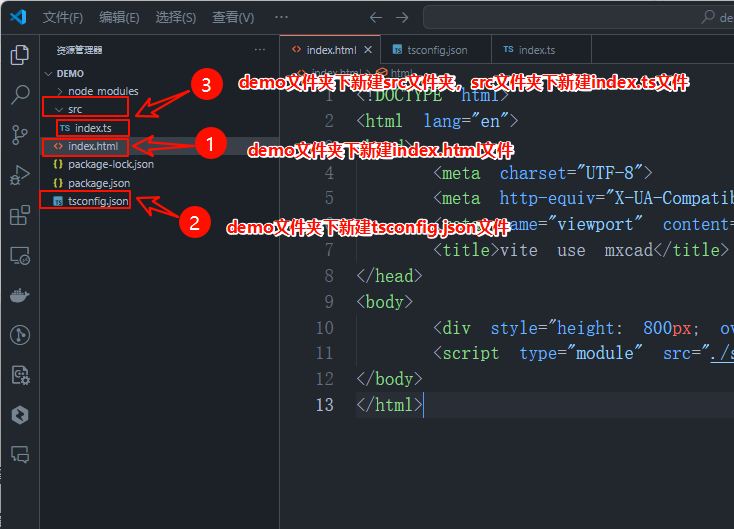
Open a terminal and run the command to run the project
shnpx vite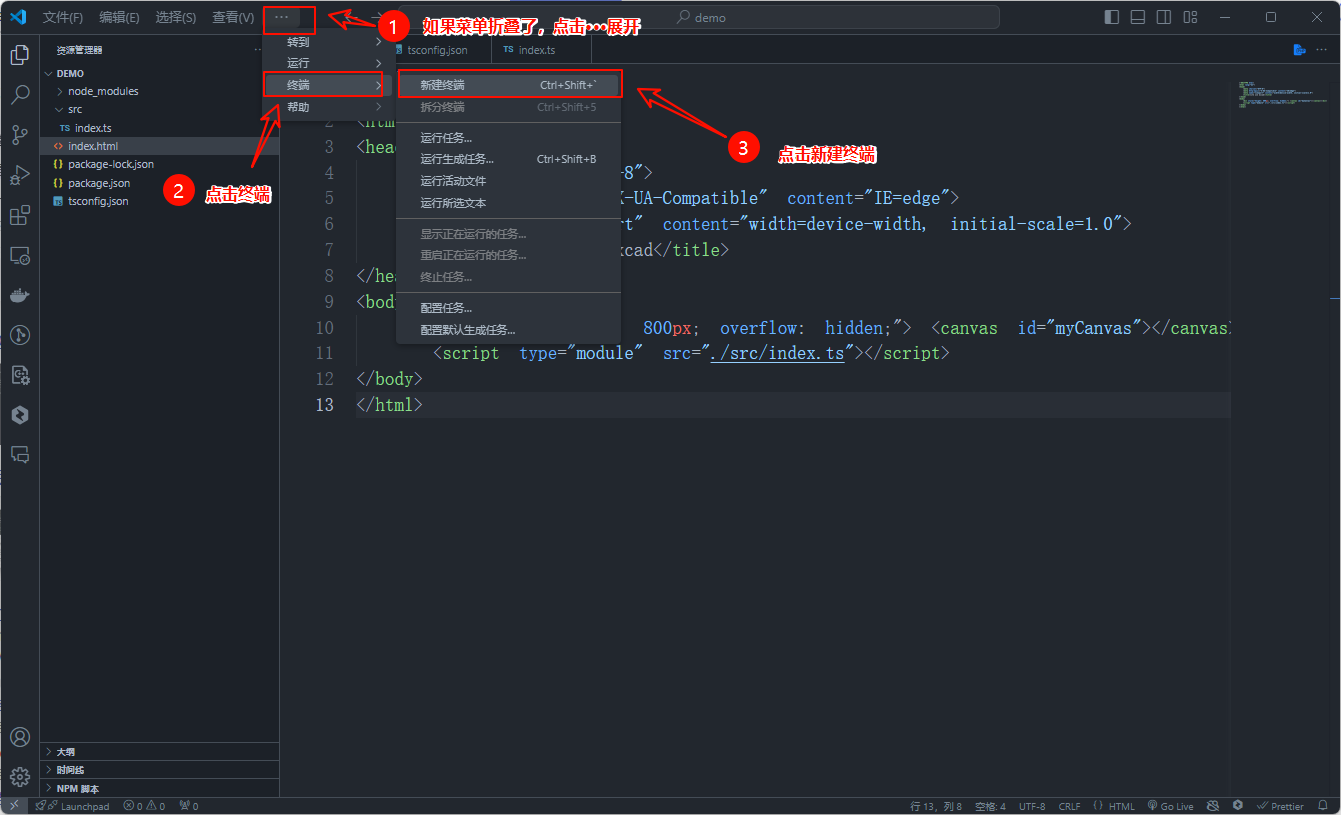
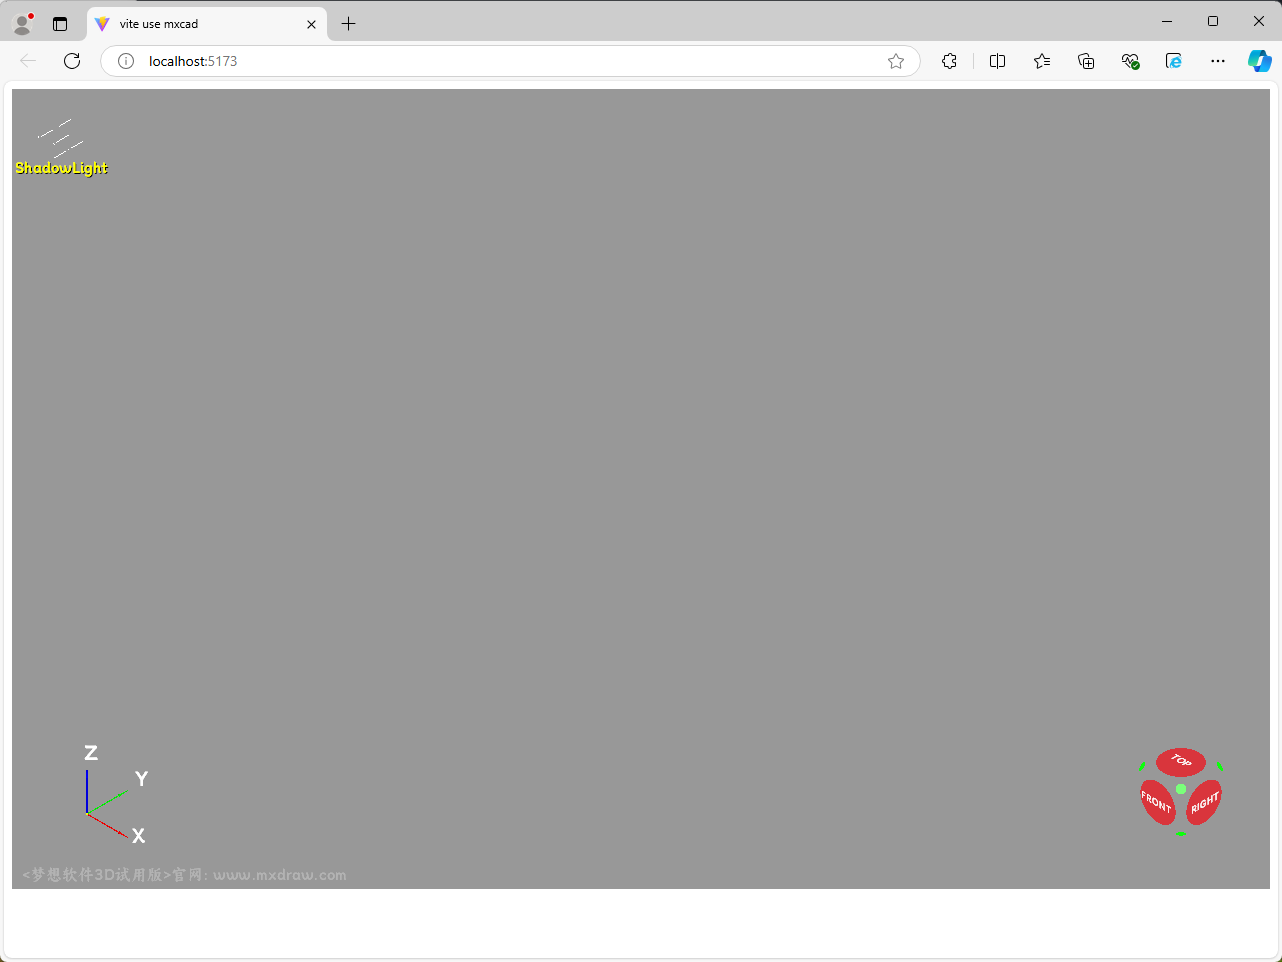
Upon opening the webpage, you will see a 3D view window in the browser
Note
GitHub and network loading may be slow, requiring a few minutes of waiting...